Register an Azure Cloud Account
This guide will walk you through setting up read-only access so Spotto can analyze your environment and provide actionable recommendations.
Why Connect Spotto to Azure?
By connecting your Azure environment, Spotto can provide insights and recommendations across:
- Cost optimization
- Performance improvements
- Security posture
- Availability and reliability
- Compliance with the Azure Well-Architected Framework and industry best practices
Spotto use your environment data exclusively to generate these recommendations. Your data is:
- Stored securely in your selected region (US, EU, or Asia Pacific)
- Never shared with third parties
- Fully deletable at any time via the Spotto Portal
Setup Read-Only Access for Azure
Follow the instructions below to grant Spotto secure read-only access:
1. Create an Entra ID (Azure AD) Application
- Go to the Azure Portal and sign in.
- Search for Entra ID and click on "Microsoft Entra ID"
- On the left menu, expand Manage and click on App registrations.
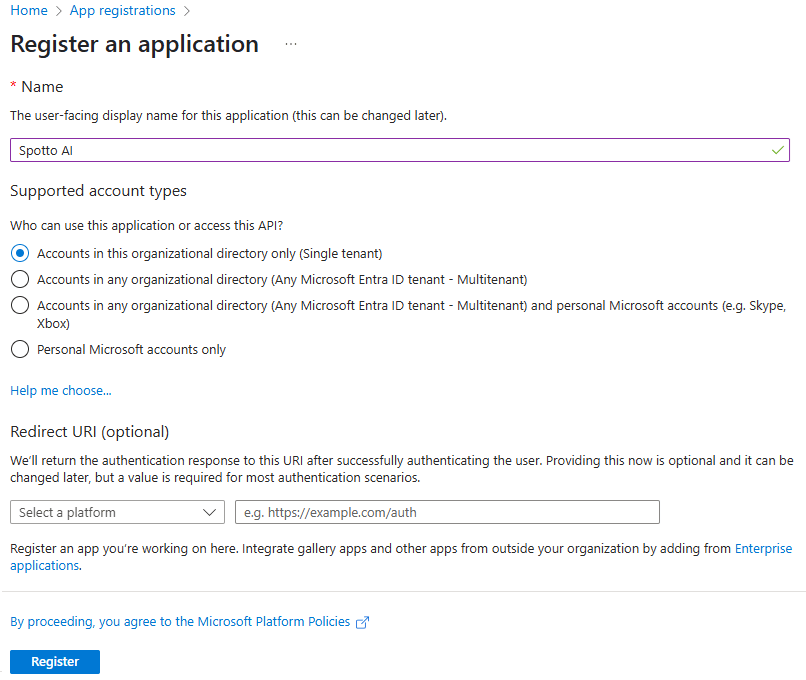
- Click New registration.
- Enter a name, e.g.,
Spotto AI. - Under Supported account types, choose Accounts in this organizational directory only.
- Leave the Redirect URI blank, then click Register.
After registration, record the following details:
- Application (client) ID
- Directory (tenant) ID
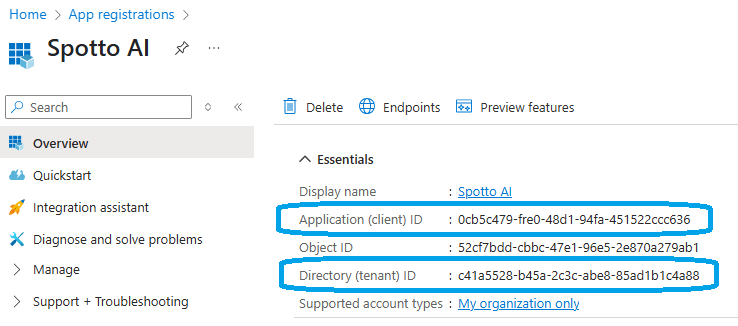
You'll need these when adding your Azure account to Spotto.
2. Create a Client Secret
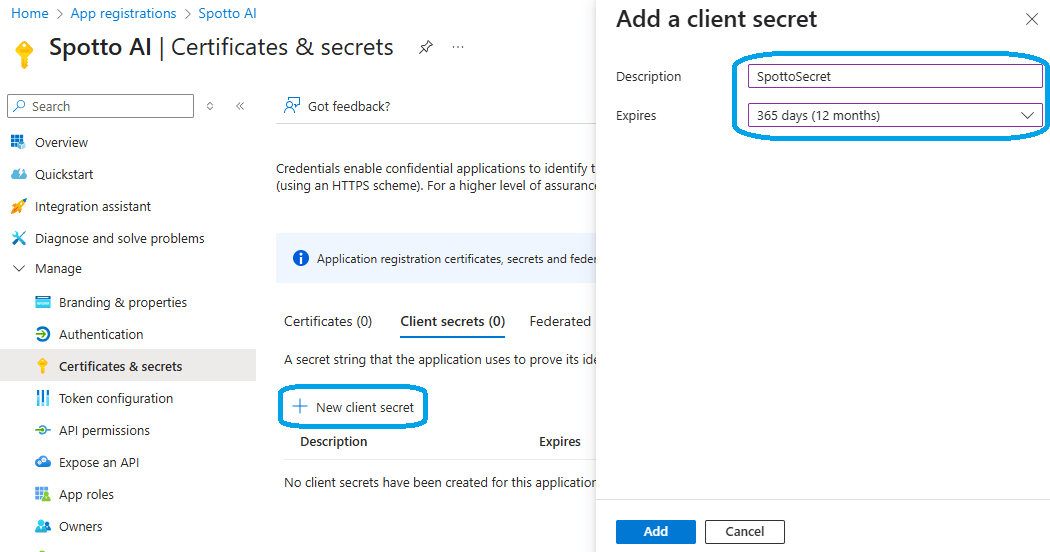
- In the App Registration you just created, go to Manage > Certificates & secrets.
- Under Client secrets, click New client secret.
- Enter a description (e.g.,
SpottoSecret) and choose an expiry period (recommended: 12 months). - Click Add.
Copy the Client Secret Value immediately — it won't be shown again.
Also record the Secret Expiry Date
3. Assign Reader and Billing Reader Roles in Azure Subscriptions
For each Azure subscription you want Spotto to analyze:
- Navigate to, or search for Subscriptions and select the desired subscription.
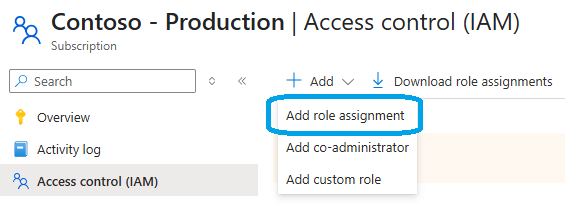
- Open Access Control (IAM) from the left-hand menu.
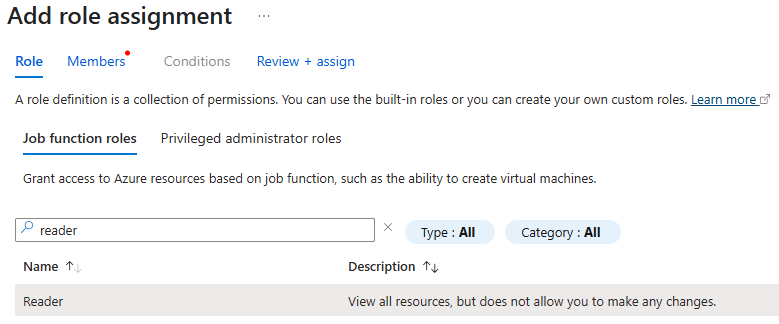
Reader permission
- Click Add > Add role assignment.
- In the Role dropdown, select Reader.
- In Assign access to, choose User, group, or service principal.
- Click Select members, find your registered app (e.g.,
Spotto AI), and click Select. - Click Review + assign to confirm.
Billing Reader permission
- Click Add > Add role assignment.
- In the Role dropdown, select Billing Reader.
- In Assign access to, choose User, group, or service principal.
- Click Select members, choose the same app (e.g.,
Spotto AI), and click Select. - Click Review + assign to confirm.
Repeat for each subscription you want Spotto to access.
4. Add Azure Account to Spotto
-
Return to the Spotto Portal.
-
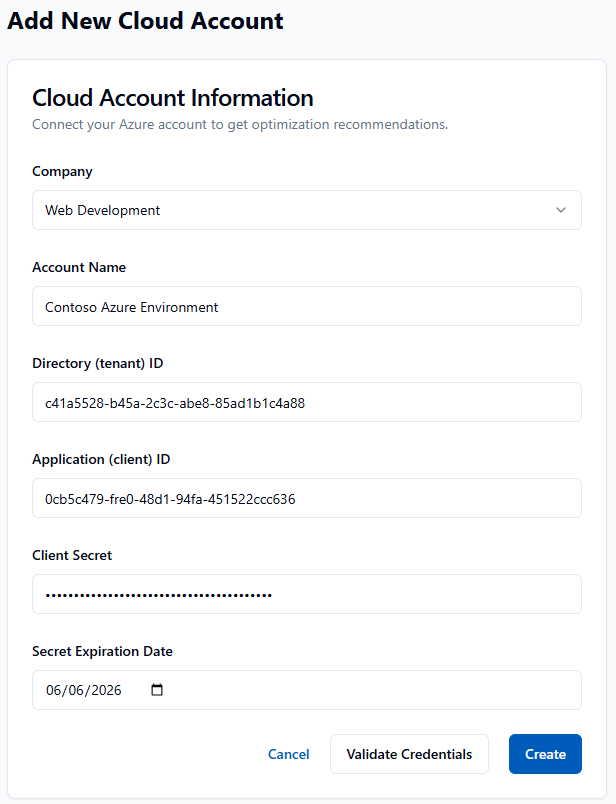
Go to Cloud Accounts and click Add Cloud Account.
-
Enter the following:
- Name e.g. My Azure Environment
- Application (Client) ID
- Directory (Tenant) ID
- Client Secret
- Secret Expiry Date
-
Click Validate Credentials.
-
Click Create.
Spotto will confirm access and display a list of subscriptions with read-only permissions.
You're Done!
Once validated, Spotto will begin analyzing your environment and will surface recommendations shortly. You can manage or delete your cloud account and data at any time via the Spotto Portal.
For further assistance, please Contact Us.